How to Wash & Reproof Walking Boots
Why Clean Your Walking Boots? Let’s start by stating the obvious: cleaning your walking boots after heavy use will keep the walking boots looking new for longer. It will also help reduce wear, so they not only look new for longer but also last longer. That aside, cleaning your boots keeps them smelling fresh, makes them more hygienic, and ultimately delays the need to spend more on a new pair of boots.
You could replace your boots when they get too mucky, but that’s hardly practical. They’re likely to get muddy and dirty frequently. Not to mention they’re usually expensive if you’ve elected to buy a quality pair. It’s best to learn the process and create the habit of cleaning your boots after use.
Though cleaning your boots is quite simple, it’s still best to follow a logical process. You’re less likely to miss anything, and the result will be better in the end as well as giving a good opportunity to reproof them.
How to Clean Walking Boots
Preparation:
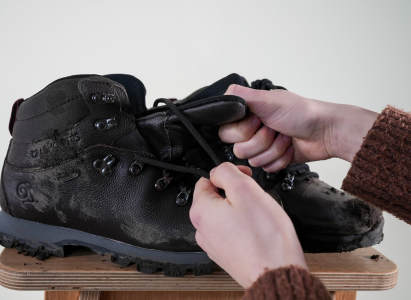
- Remove your laces and insoles.
- Remove any grit or small stones that have found their way into your boots. Flex the tongue and shoe gently to encourage any grit or stones that have managed to wedge into any creases in the leather or fabric.
- Gather your items: a bowl with warm soapy water, a cloth and a soft brush.
- Brush away any loose dirt. Some moisture helps this process, but at this stage, it’s not critical. If the mud is thick, then use a splash of water to loosen it. Avoid soaking the boots, especially if you don’t have the capacity to dry the boots quickly, particularly if you’re still on your travels.
Now that you’ve finished preparing it’s time to clean. Read through each step before beginning to help avoid any blunders.
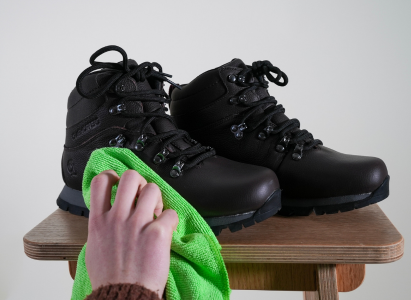
- Clean the upper using a gentle soap and some warm water (cold will do if you’re at the campsite). Take hold of your brush, dip it in the water and begin to brush away any muck. Back and forth on the open/smooth areas and a circular or swiping motion for when brushing edges or stitching.
- Regardless of the material (leather, suede, nubuck, fabric), you should brush gently. Avoid scrubbing. It can wear down the upper, which can take away colour but also make the materials more porous and so more likely to absorb water.
- Clean the laces if you feel they’ve collected enough dirt. Use soapy water and massage with your fingers and thumbs.
- Clean the insoles with a damp cloth. Use a damp cloth to avoid soaking the insoles. Use warm soapy water, wring out the cloth and wipe over the insoles thoroughly.
- Clean the Soles with a similar process to the upper. You can submerge the soles though be wary not to submerge them too far in order to keep the fabric or leather from getting wet. Brush along the lines and crevices of the soles with a liberal amount of soapy water. Muck and dirt are more compact on the soles, so they will require more effort.
How to Dry Walking Boots
Whether you’ve just finished cleaning your boots or you’ve come back from a trail after submerging them in muddy water, here we’ll instruct how to dry your walking boots. It is recommended you clean your boots first.
This is the stage in walking boot care that can cause the most harm to your boots, so please take care to follow instructions.
- Separate your laces, insoles and boots. We need to allow as much airflow as possible to carry away the moisture. So, separating items is first.
- Place the boots, laces & insoles in a high airflow area, away from corners and walls. A couple of good options are: on the kitchen table (they’re not new, so it isn’t bad luck), with the windows open on each side of the room to create that airflow, in the tent vestibule or in the awning propped up on a stool.
- Add small towels or newspapers to the insides of your boots and place the insoles and laces on a towel. This makes a noticeable difference in drying time.
A final step to take is to reproof your boots. If you’re using a spray on re-proofer, then while the boots are still damp spray the boots from approximately 30 centimetres. Then allow the re-proofer to set. If you’re using a wax or cream the let the boots dry first. No re-proofer is a waterproof barrier. They simply delay water from soaking into your boots.
Do not place the boots near a radiator, a fireplace, a campfire or in sunlight. Don’t put them near any heat source. Drying with heat can shrink, warp and crack leathers and shoe fabrics. It can also dehydrate any glues. All of which destabilise and ruin your footwear.
Do not use a tumble dryer either, for the reasons mentioned above. I must emphasise that putting your boots into the dryer is likely the worst thing you can do to them.
That about wraps up our guide on how to clean your walking boots. We’ll soon be creating a guide on how to polish leather boots and how to care for suede walking boots. Watch this space. Lastly, is it time you washed your waterproof jackets or puffer jackets? Follow the links for more information.
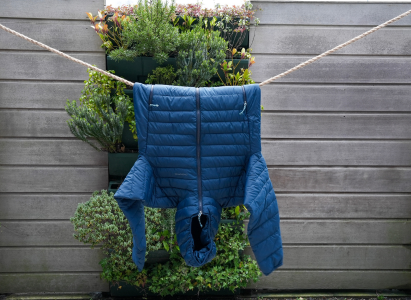
Washing & Reproofing Puffer Jackets
Learn how to wash & re-proof your puffer jacket
Washing Waterproof Trousers
Learn how to wash and re-proof your waterproof trousers
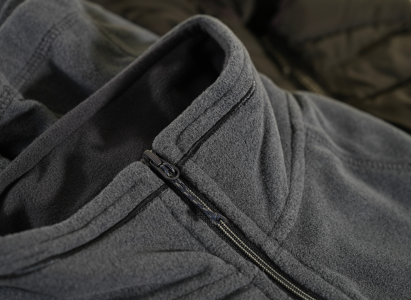
Maintaining your Fleece
Learn how to maintain your fleece clothing

Washing a Waterproof Jacket
Learn how to wash & re-proof a waterproof jacket